Besides invoices that are created automatically after a payment, you can also create an invoice for a customer yourself in RCUR. This can be a one-off invoice or a recurring one: RCUR then creates the invoice for you at the set moments in your connected invoicing app.
Creating invoices is available from the Professional plan and works with your connected invoicing app (for example Moneybird, Exact Online, WeFact or e-Boekhouden).
Preparation
Connect your invoicing app via Settings > Integrations. There is a guide for each app in this help center, for example for Moneybird, Exact Online, WeFact and e-Boekhouden.
Connect the customer to a contact in your invoicing app. Open the customer, click “Edit customer” and choose an existing contact at “Contact in …”, or choose the option to create a new contact. Then click “Save”.

As long as a customer is not connected to a contact, the “Invoices” tab does not appear. If you try to create an invoice anyway, you are asked to connect the customer to a contact first.
Creating an invoice
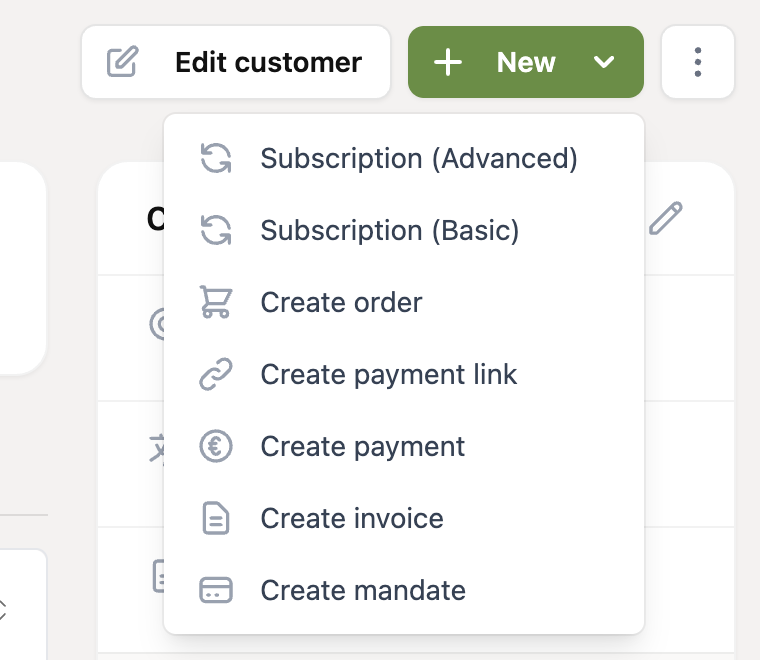
Open the customer, click “New” at the top right and choose “Create invoice”. You can also do this from the “Invoices” tab.
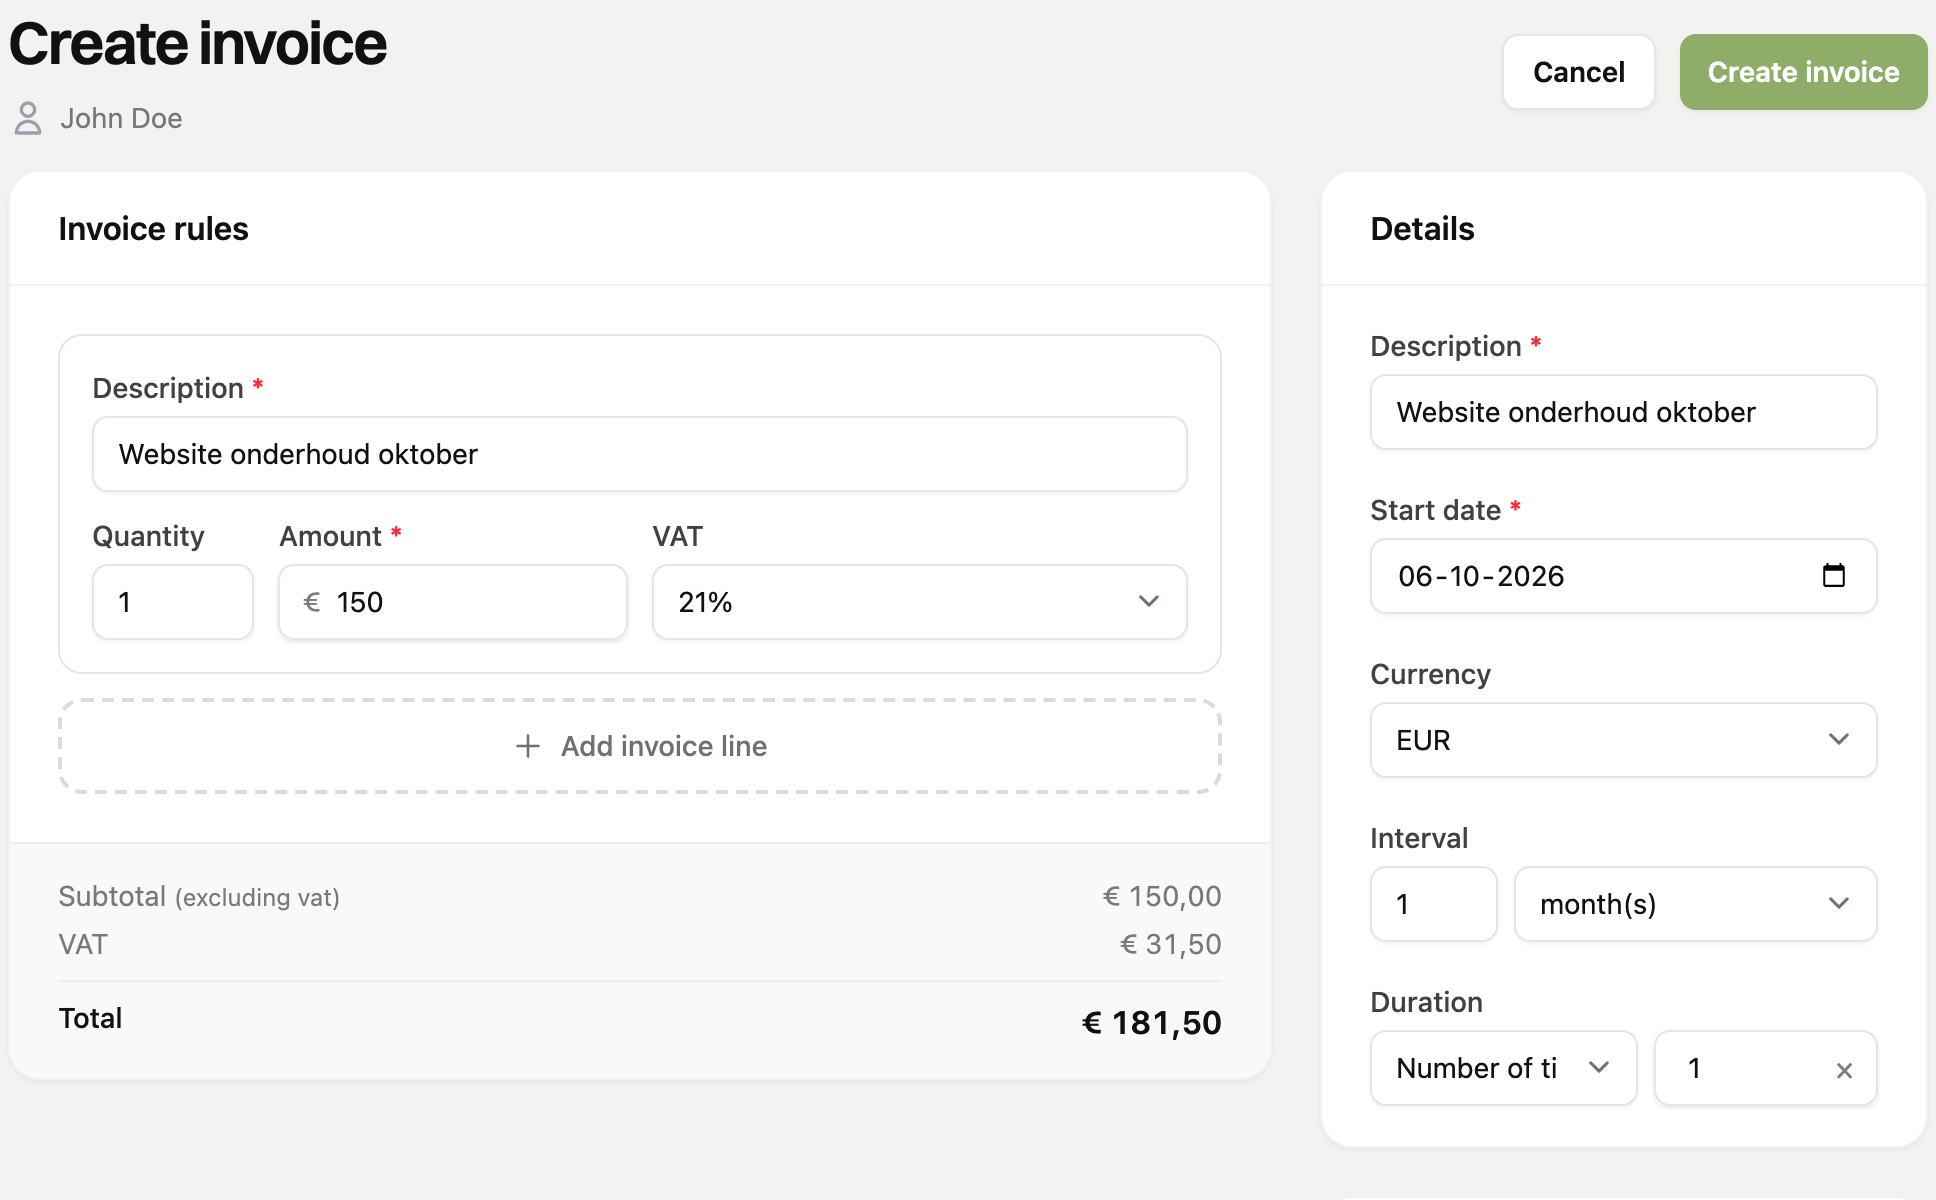
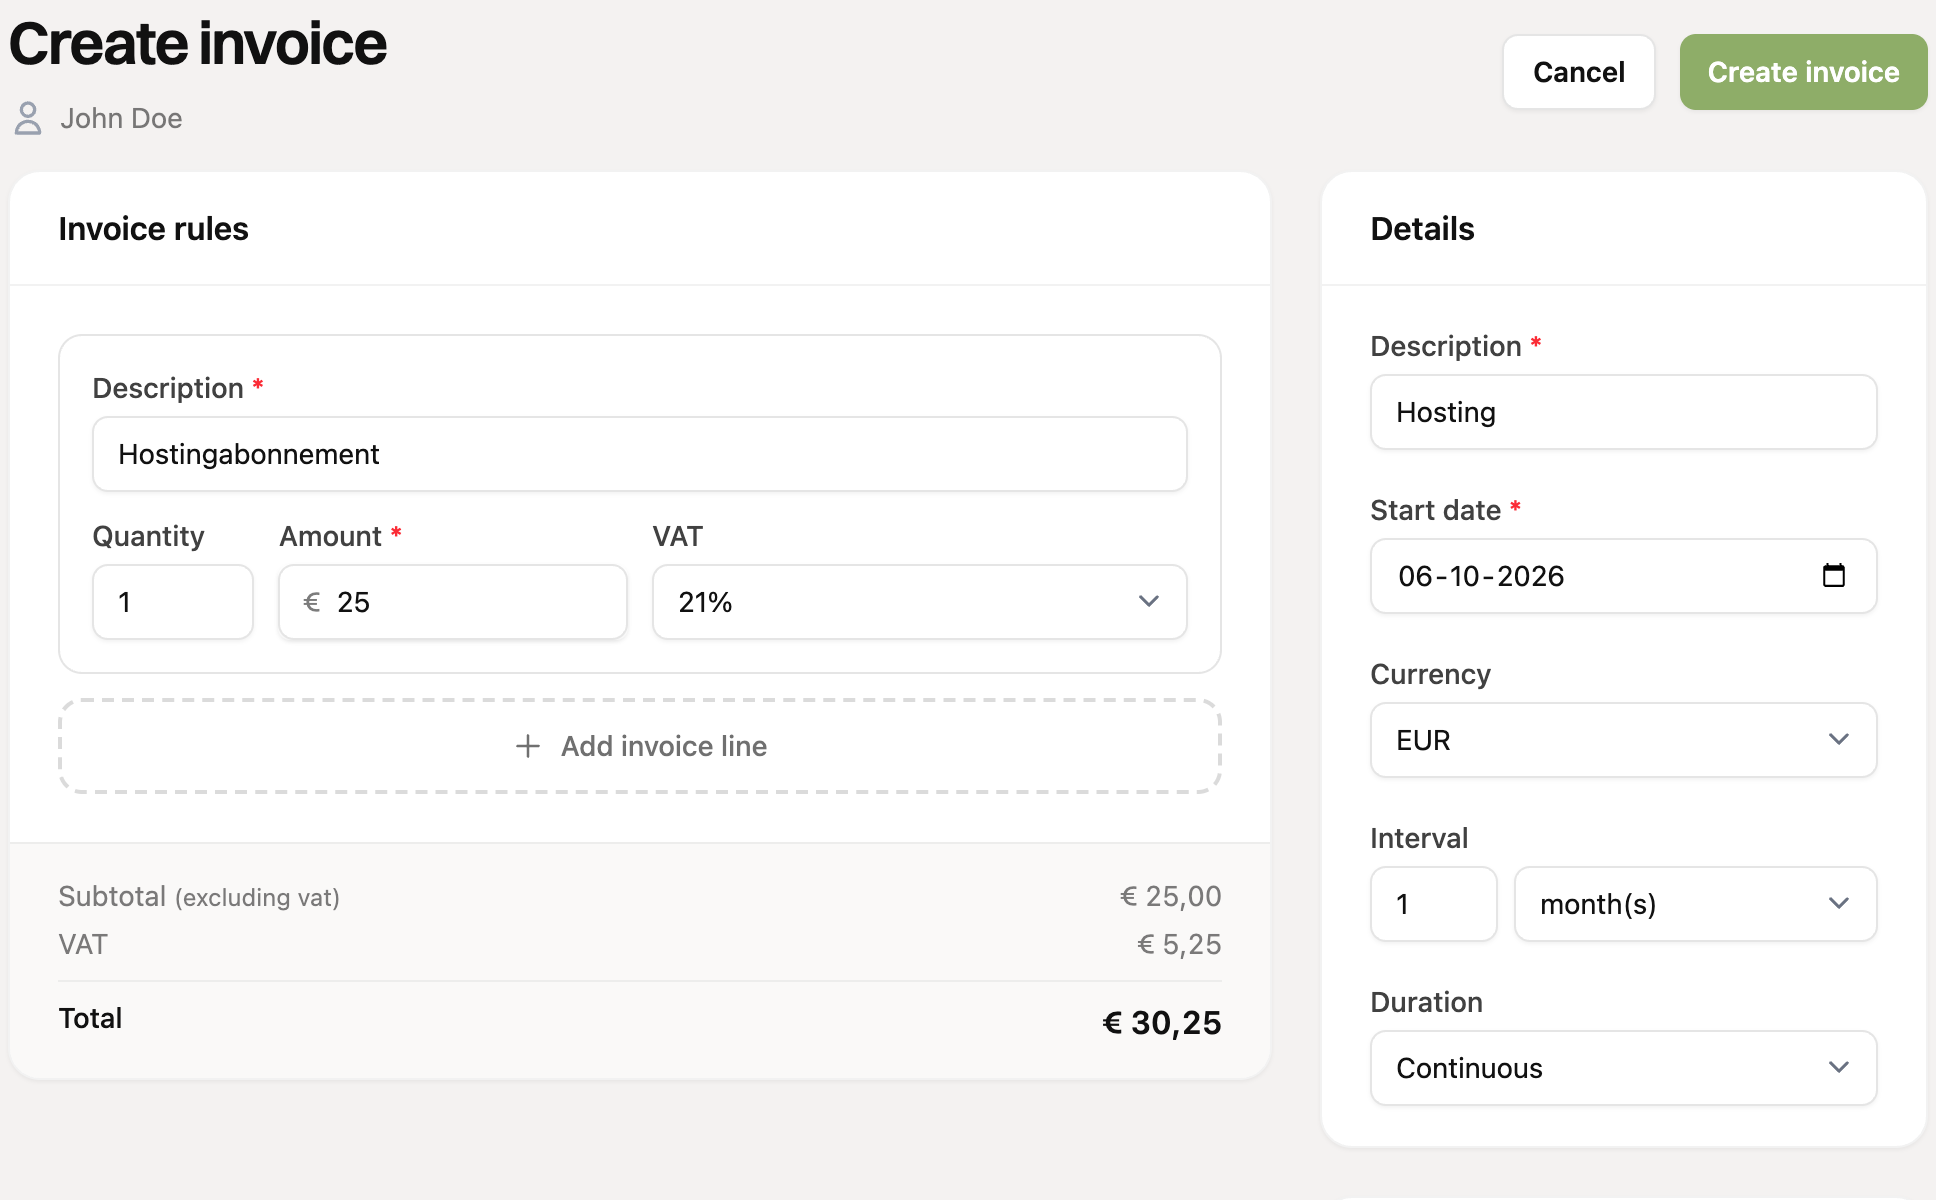
Under “Invoice rules”, fill in the line: a description, the quantity, the amount and the VAT rate. Use “Add invoice line” to add more lines. At the bottom you immediately see the subtotal, the VAT and the total. Depending on your invoicing app you may see extra fields here, such as a category or ledger account, an item, a document style or a workflow.
Under “Details”, enter a description and choose the start date (today or later), the currency, the interval and the duration. How you set these depends on whether the invoice is one-off or recurring.
Click “Create invoice”. You return to the customer’s “Invoices” tab. If the start date is today, the first invoice is created right away.
A one-off invoice
Under “Duration”, choose “Number of times” and enter 1. The invoice is created on the start date and after that the schedule stops.
A recurring invoice
Under “Interval”, set how often the invoice should recur, for example every 1 month (you can choose days, weeks or months). Then choose under “Duration”:
Continuous: the invoice keeps recurring until you delete the schedule.
Number of times: the invoice stops after the set number of invoices, for example 12.
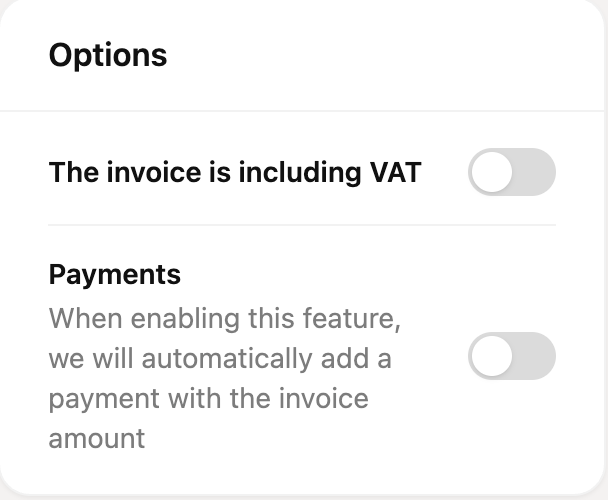
Options
The invoice is including VAT: turn this on if the amounts you entered already include VAT.
Payments: if you enable this, we automatically add a payment with the invoice amount. This is only available if recurring payments are possible for your account, and it is on by default when the customer has an active mandate.
Overview and deleting
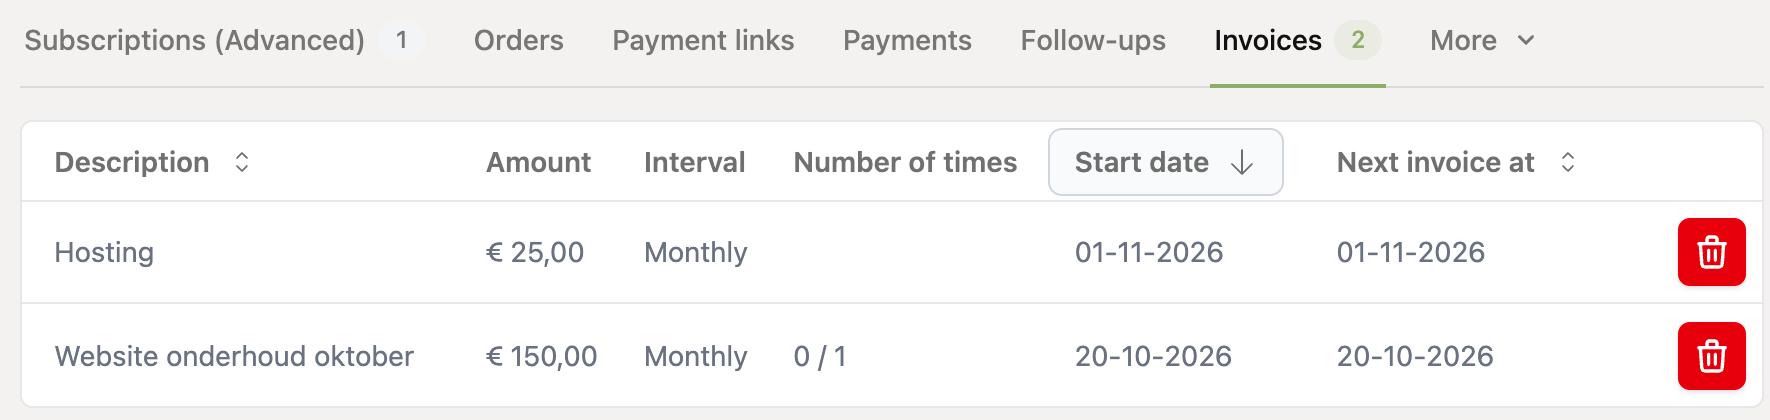
On the “Invoices” tab you see for each invoice schedule the description, the amount, the interval, how many invoices have already been created (for example 0 / 1), the start date and the date of the next invoice. Use the trash icon to delete a schedule, so no new invoices are created anymore.