Do you often sell the same subscription to different customers, for example a monthly vegetable box or a subscription with an introductory period? Then you do not need to fill in the payment schedule every time. With an Advanced subscription template you set up the subscription once and assign it to a customer afterwards.
A template itself is never charged. Money is only collected once you assign the template to a customer. This article is about templates for Advanced subscriptions. Your e-mail templates are under Settings > Templates.
The overview
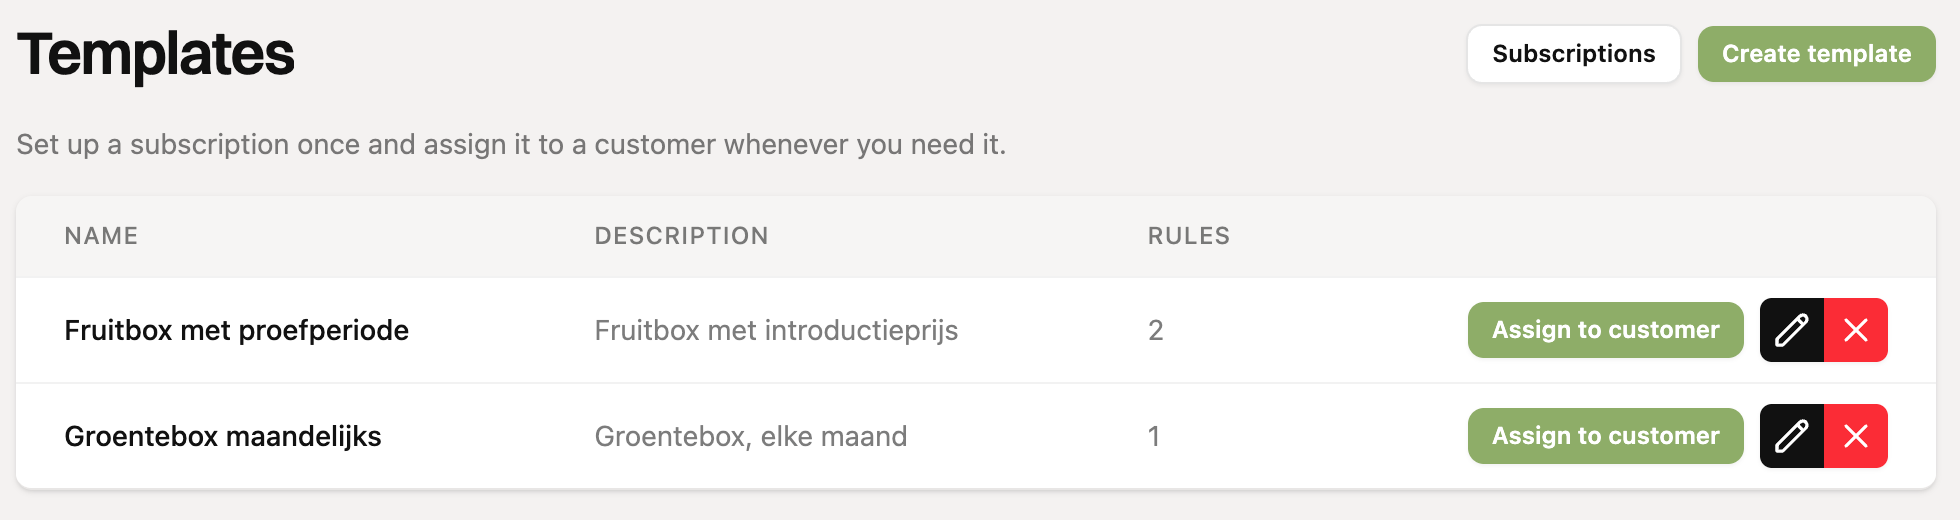
Go to Subscriptions (Advanced) and click Templates in the top right. For each template you see the name, the description and the number of rules in the payment schedule. If invoicing is enabled for the template, a label is shown next to it.
Creating a template
There are two ways to do this.
From scratch
Click Create template in the overview.
Enter a template name. This name is only for you and is not visible to your customers.
Enter the description. It is used for the subscription and on the invoice. Also choose the currency.
Click Create template. You now arrive at the screen where you configure the rest.
From an existing subscription
Do you already have a subscription that is exactly how you want it? Open that subscription, click the menu in the top right and choose Save as template. All settings and rules are copied to a new template.
Configuring a template
On the edit screen you set the general details on the left and the payment schedule on the right.
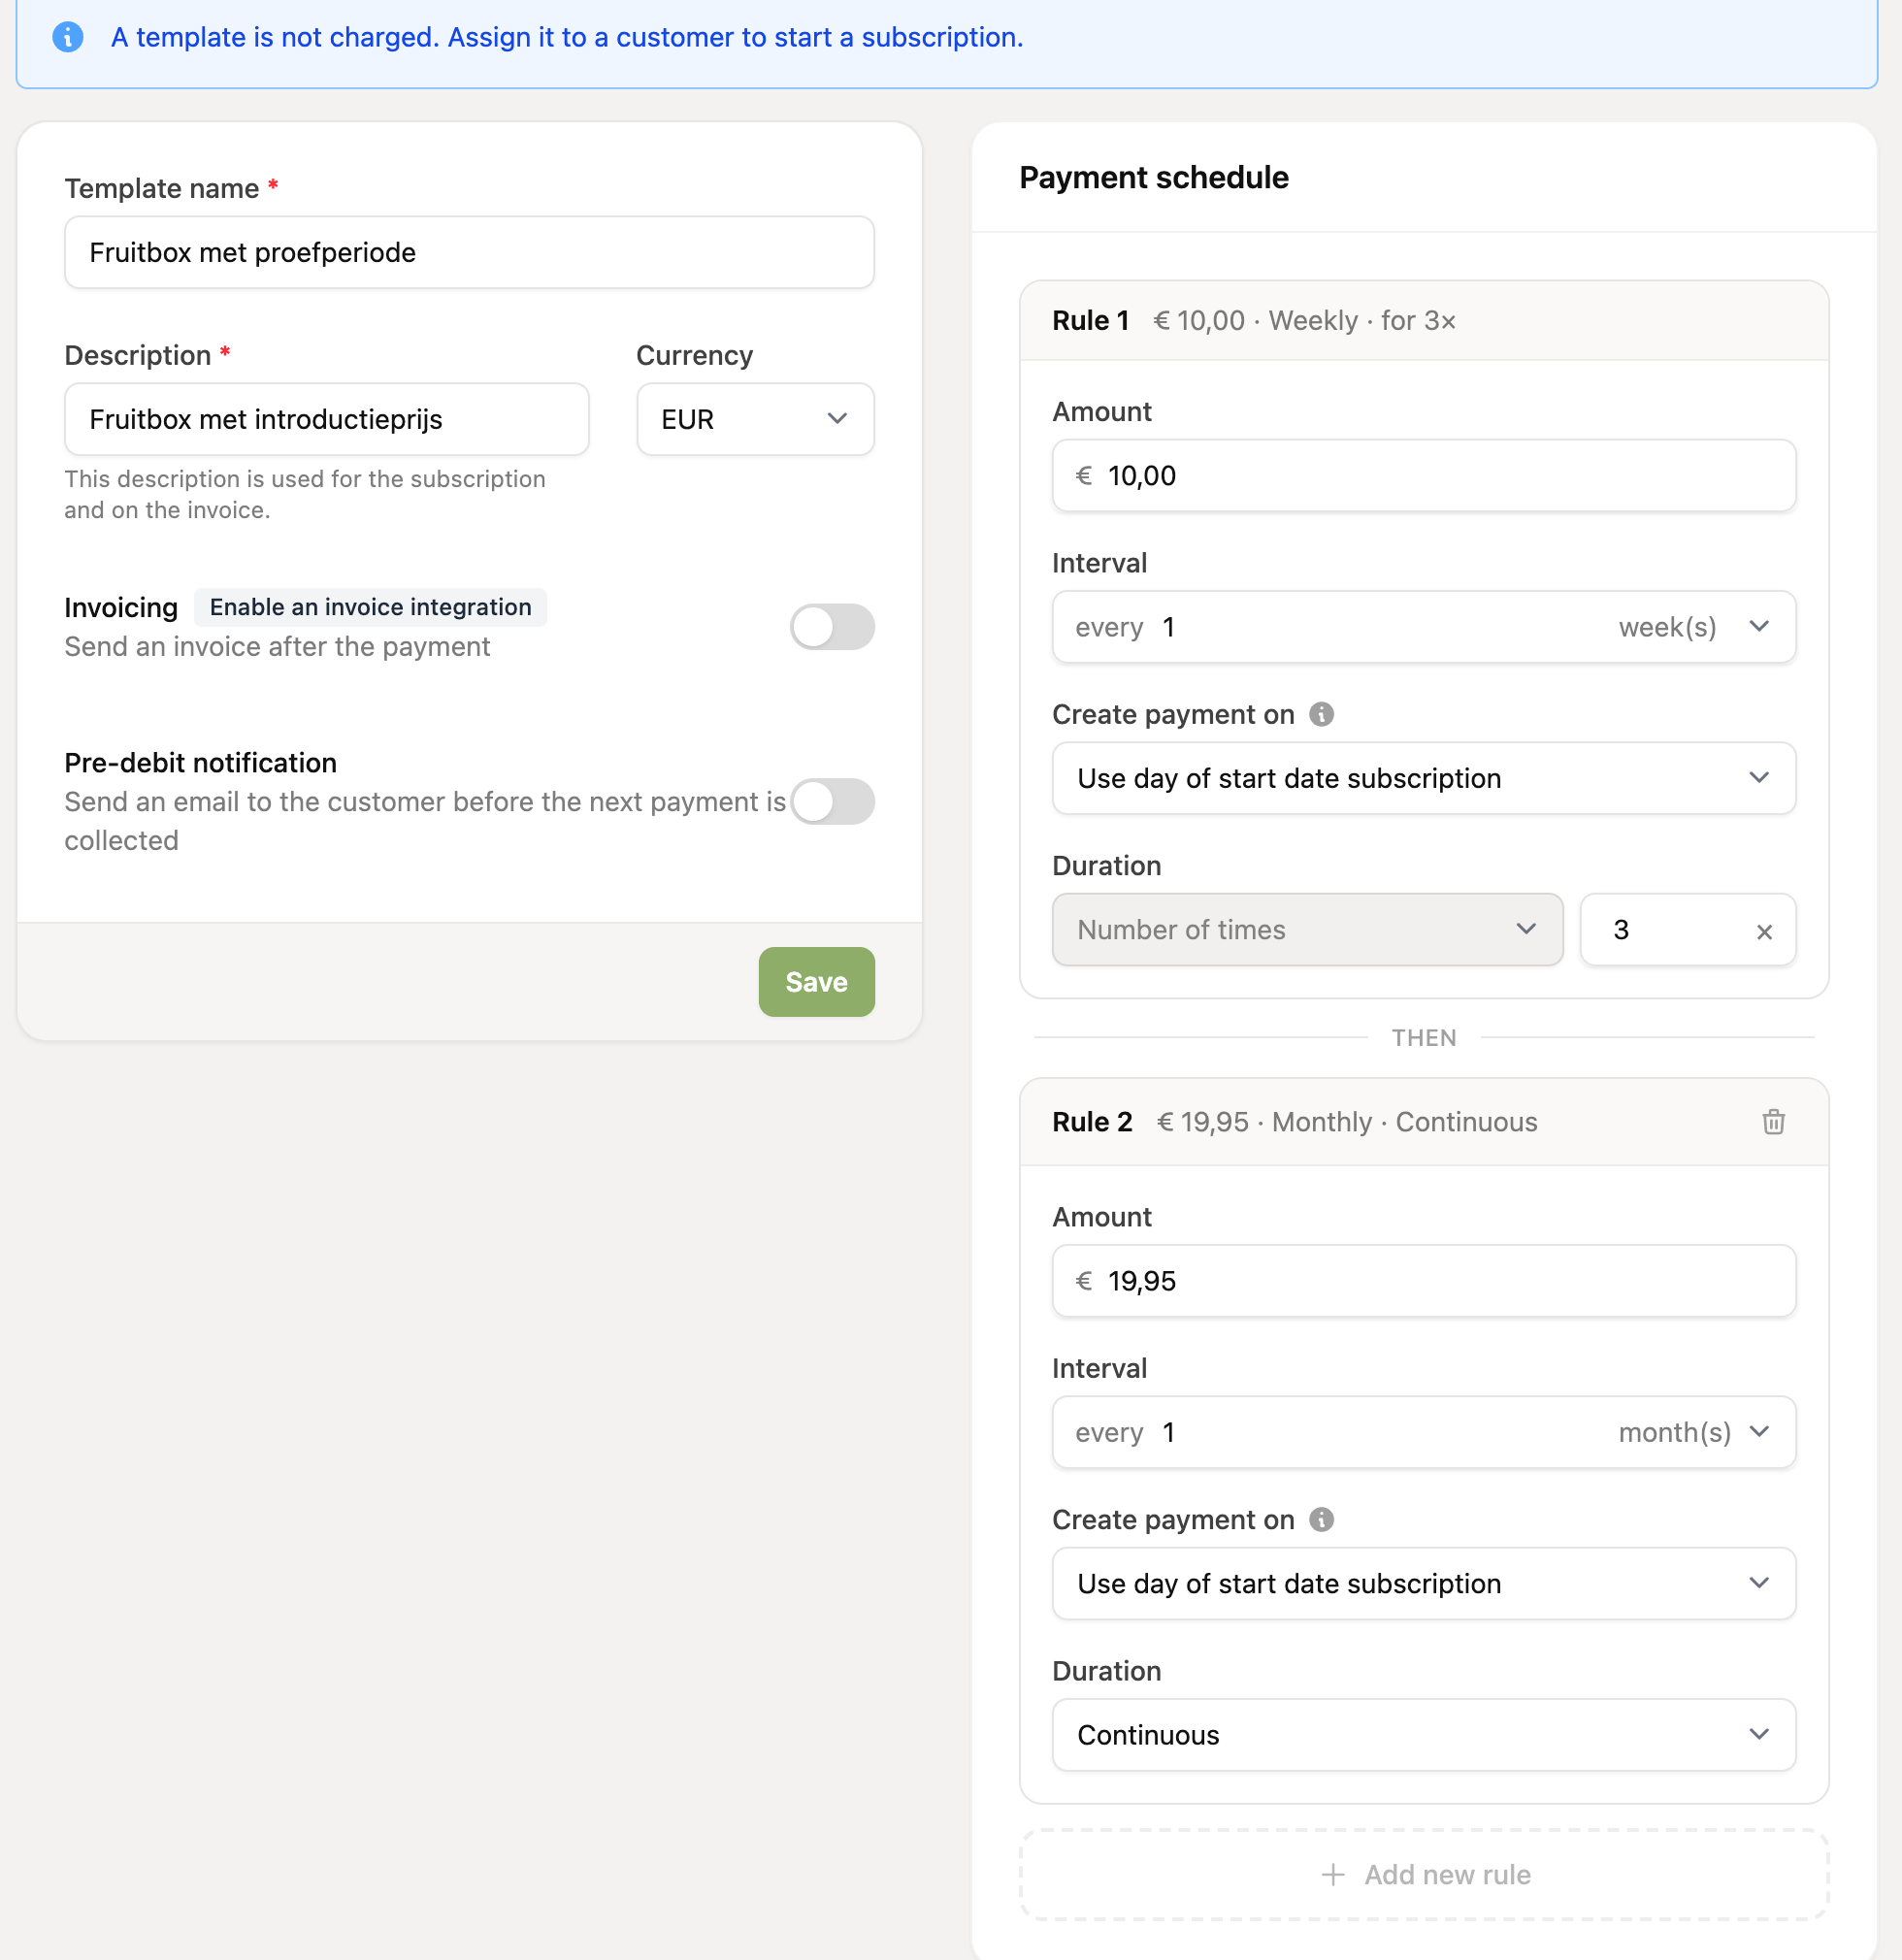
Payment schedule: a template consists of one or more rules. For each rule you choose the amount, the interval (for example every month), the day the payment is created and the duration. With multiple rules you can build an introductory price, for example three weekly payments of €10.00, followed by €19.95 every month, continuously.
Invoicing: if you have connected an invoicing app, you can also set here that an invoice is created after each payment, including the document style and workflow.
Pre-debit notification: send your customer an e-mail a few days before the payment is collected. Choose the e-mail template and the number of days.
Customer portal: if the customer portal is enabled, you decide here whether customers may manage this subscription themselves.
Finally, click Save.
Assigning a template to a customer
Click Assign to customer next to the template in the overview. You can also do this from the edit screen.
Choose the customer. The active mandates of that customer then appear.
Choose the mandate that will be used to collect the subscription. If the customer has no active mandate yet, you can create one right away.
Choose the start date.
Click Add subscription.
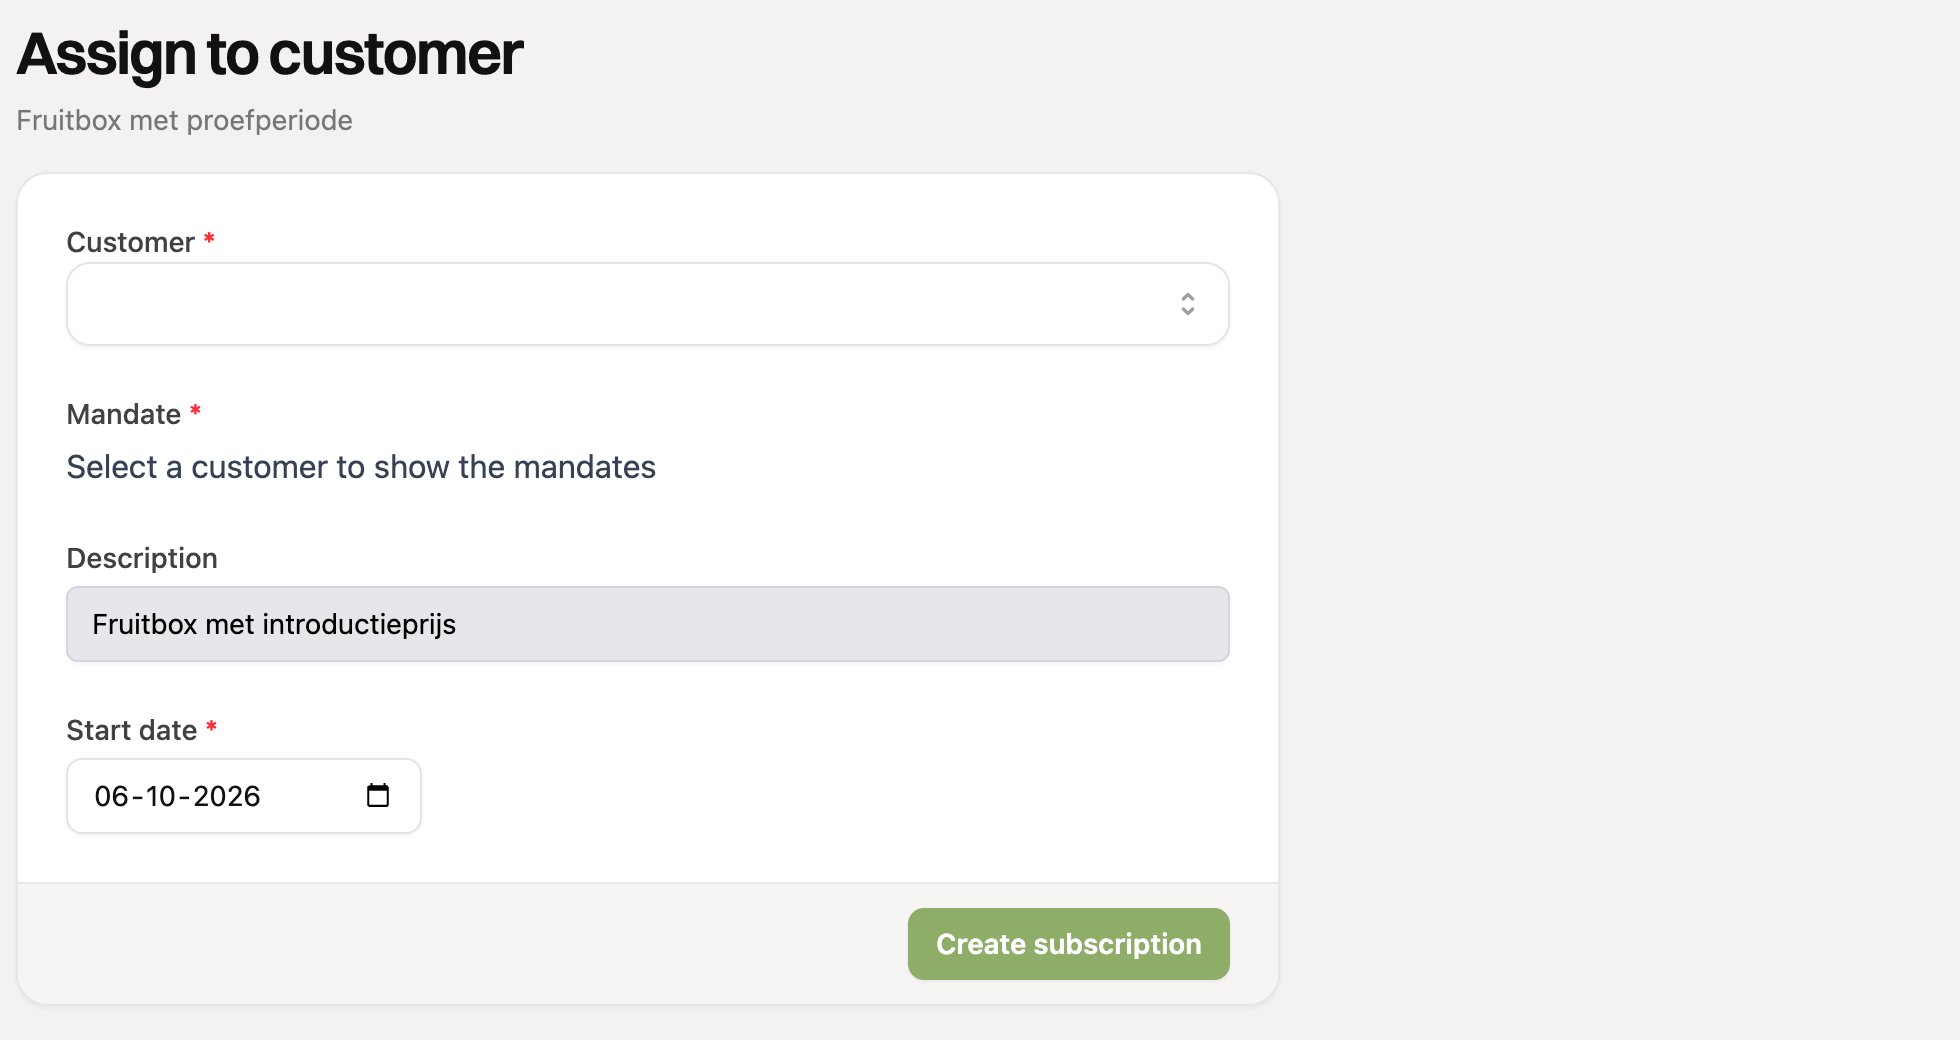
The subscription is created and activated immediately, with the rules and settings of the template. You can still adjust it afterwards, just like any other Advanced subscription.
A subscription is a copy of the template at the moment you assign it. If you change the template later, existing subscriptions do not change with it. To change the prices of running subscriptions, use the bulk editor for subscriptions.
Deleting a template
Click the red cross next to the template in the overview and confirm. Subscriptions you created with the template earlier remain in place.
Good to know
Templates are available for Advanced subscriptions.
Pre-debit notifications and e-mail templates can only be chosen if e-mails are enabled in your plan.
Invoicing only works with a connected invoicing app.